
Step-by-Step Guide: How to Add Money to Apple Pay Easily
Apple Pay has changed the way we pay. But how do you add money to your Apple Pay? Here’s the step-by-step process:
- Open the Wallet app on your iPhone and tap on the Apple Cash card.
- You can choose to transfer funds from a bank account or receive money from others.
- You can also use Apple Pay Cash for person-to-person payments. Just send money to someone’s Apple Pay account through iMessage.
- No need to leave the conversation to split bills or pay back borrowed money.
Apple Pay offers convenience and security. Use it for online shopping, in-store purchases, or splitting expenses. It simplifies financial transactions. Take full advantage of this innovative technology today!
Setting up Apple Pay
- Locate the Wallet app on your device and open it. Can’t find it? Swipe down on your home screen & use the search bar.
- Tap the “Add Card” option inside the Wallet app.
- Follow the directions to manually add your debit/credit card info or use the camera to scan it.
- After adding, your bank may need to verify it. This could involve an SMS confirmation or other methods.
- Once verified, you’re ready to use Apple Pay at participating stores.
- Your bank may also require extra authorization/passcodes during setup for extra security.
Apple Pay arrived in 2014, revolutionizing payments. Now it supports contactless, online shopping & peer-to-peer transfers. Its popularity has made it a leading mobile payment solution!
Adding a bank account to Apple Pay
Adding a bank account to Apple Pay allows you to conveniently and securely make payments using your iPhone or Apple Watch. To set it up, follow these simple steps:
- Open the Wallet app on your device.
- Tap on the “+” symbol to add a new card.
- Choose to add a bank account or credit card.
- Follow the prompts to enter your account details and verify your card.
By adding a bank account to Apple Pay, you can easily make purchases at supported stores and online merchants without the need to carry physical cards. It provides an extra layer of security as your card details are not shared with the merchant, reducing the risk of fraud.
True fact: Apple Pay was introduced by Apple Inc. in 2014 and has grown to become a popular mobile payment method worldwide.
Unlock the gateway to digital wealth by diving into the mesmerizing world of the Wallet app, where money magically multiplies with just a touch (and a price for each transaction, of course).
Open the Wallet app
Want to use Apple Pay? You’ll need to know how to use the Wallet app. Here’s a guide to get started:
- Locate the Wallet app on your Apple device – it should be easy to find, either on your home screen or in the apps folder.
- Tap the app to open it up. See if any credit or debit cards have been added.
- Look for ‘Add Bank Account’ or something similar, and follow the prompts to input your info.
Now you know how to open the Wallet app. It also stores loyalty cards, boarding passes, tickets – all in 1 place. Tap the app to instantly access digital assets. Don’t miss out! Use Apple Pay – experience seamless transactions with just a tap!
Tap on the “+” symbol to add a card
Tap the “+” to add a card to Apple Pay – transforming transactions! Here’s a 3-step guide:
- Find the “+” at the top-right of your screen.
- Choose ‘Add Credit or Debit Card’ and scan the details or type them in.
- Verify the info with your bank and you’re done! The card is added.
Apple Pay makes payments easy with its support of banks and credit unions from around the world.
Did you know this was introduced in 2014 with Apple Pay? It became a hit due to how simple and convenient it was, letting users virtually pay.
Select “Add a Card or Bank”
For integrating your bank account with Apple Pay, select “Add a Card or Bank”. This will connect your financial institution to your Apple Wallet. Here’s how:
- Open the Wallet app.
- Scroll down and pick “Add a Card or Bank”.
- Follow the steps to enter your bank account details.
You can use Apple Pay at stores and online platforms that accept it. It’s secure, fast and convenient, as you can pay with a tap of your device.
My friend Sarah was amazed by Apple Pay’s convenience and security after she added her bank account. She now uses it for buying groceries and other necessities, without having to carry physical cards or cash.
Follow the prompts to enter your bank account information
Adding a bank account to Apple Pay is easy! Here’s a 3-step guide to get you started:
- Open the Apple Pay app and select ‘add a new bank account’.
- Enter your bank account details like your account number and routing number.
- Double check the accuracy of your input before you submit.
It’s important to remember to verify all the bank account info is correct before adding your account. That way, you’ll have a smooth experience with Apple Pay.
To get the most out of your user experience, here are some tips:
- Keep your banking credentials secure – use strong passwords or biometric authentication like Face ID or Touch ID.
- Update your banking info when needed.
- Use additional security features like transaction notifications and disabling lost or stolen devices remotely.
Follow these tips and you’ll have no trouble linking your bank account to Apple Pay, while keeping your financial transactions safe and secure.
Verifying the bank account
Verifying the authenticity of your bank account is an important step in adding money to Apple Pay. To verify your account, follow these three simple steps:
- Link your bank account: Open the Apple Pay app and navigate to the “Wallet & Apple Pay” settings. Tap on “Add Bank Account” and follow the prompts to add your bank account details.
- Confirm your identity: Apple Pay may require you to verify your identity through various methods, such as answering security questions or providing additional documentation. Follow the instructions provided to complete the verification process.
- Authenticate the account: Once your identity is confirmed, Apple Pay will send a verification code to your linked bank account. Check your email or messages for the code and enter it into the app to authenticate your bank account.
It’s important to note that each bank may have specific requirements or additional steps during the verification process. Be sure to follow any instructions provided by your bank to ensure a successful verification.
Adding money to Apple Pay provides a convenient and secure way to make payments using your iPhone or Apple Watch. By verifying your bank account, you can enjoy the benefits of seamless transactions and enhanced security.
Did you know? Apple Pay was first introduced in 2014 and has since gained popularity as a contactless payment solution. It is supported by a wide range of banks and retailers globally.
Verify your bank account like an undercover detective checking for hidden deposits.
Check your bank account for verification deposits
Need to withdraw funds or verify bank details? Check your bank account for verification deposits. Here’s how:
- Log in to your online banking.
- Go to the transaction history or recent activity section.
- Look for small deposits from the verification source.
- These deposits are usually below a dollar. They prove the account is correct. It may take several business days for them to show up.
Review each transaction carefully. Note down the exact amounts for future reference. Banks may display transactions differently. If you can’t find the verification deposits, contact your bank’s customer service for help.
Forbes say verifying accounts with small deposits is a common method used by financial institutions and online platforms.
Open the Wallet app and tap on the added bank account
Verifying your bank account is essential in the digital banking world. To do this, you must open the Wallet app and tap on the added bank. This confirms your ownership and creates a secure connection between your wallet and your bank. Here’s a 5-step guide to help you navigate this process:
- Start the Wallet app on your device.
- Find and select the option for managing accounts.
- Look for the section displaying added bank accounts.
- Tap on the bank account that needs verification.
- Follow the provided instructions to complete the process.
Keep in mind: Banks may have different steps or requirements for verification. So, carefully follow the instructions from your bank within the Wallet app. If you have difficulties or concerns, reach out to customer support for help.
An interesting fact: According to Statista, 509 million people in China used mobile payments in 2020. So, with these steps and technology, verifying our bank accounts is now a seamless and secure experience.
Enter the verification deposit amounts
Verifying your bank account requires you to enter the verification deposit amounts. Simple steps will guarantee a secure process.
Step 1: Access your bank.
Log in using your online banking platform or mobile app. Have required credentials ready.
Step 2: Find the verification deposits.
Go to the section with verification deposits or look for any transactions with small amounts. These deposits are sent by the bank for verification.
Step 3: Enter the deposits.
Put the amounts into the verification page field. Ensure accuracy to avoid errors.
Accuracy is important when entering the verification deposits.
Pro Tip: Look out for emails or texts from the bank about the timing and instructions of entering the deposits. This will make it easier for you.
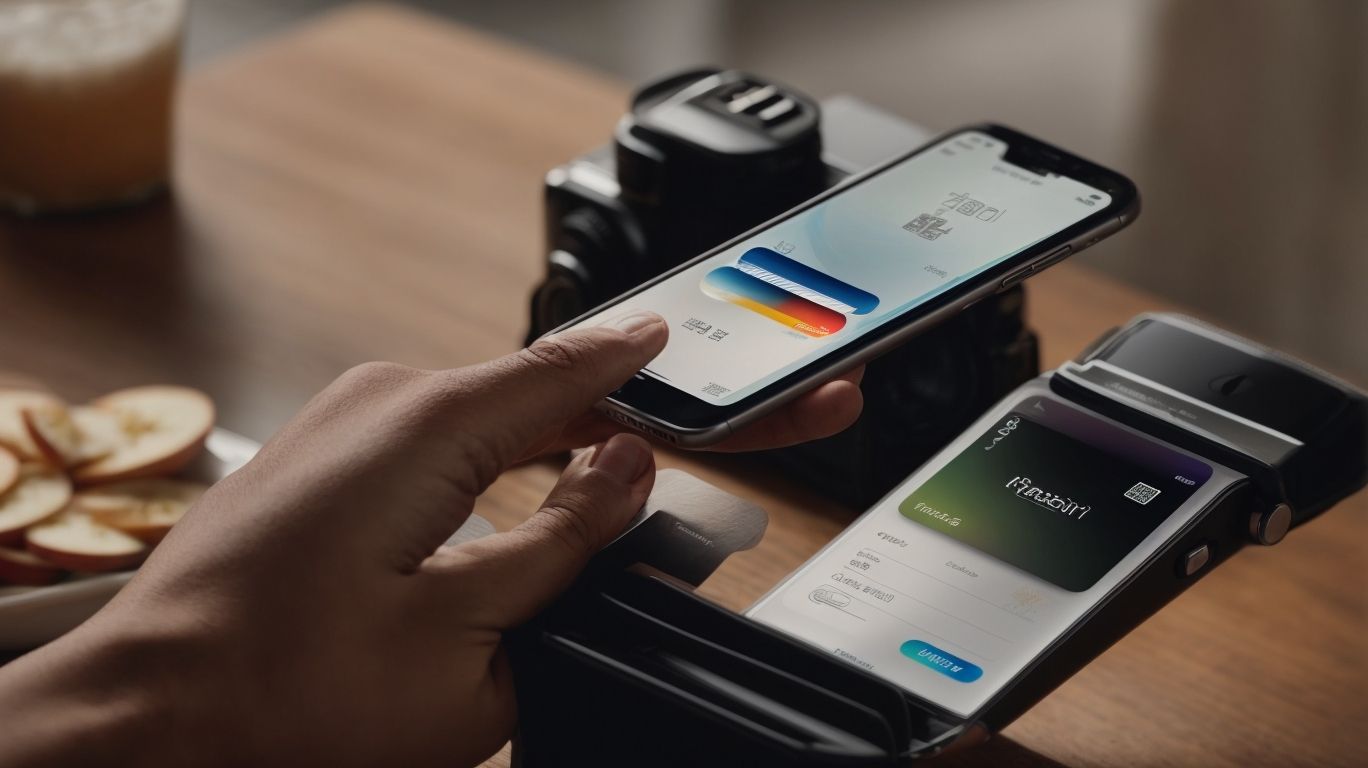
Adding money to Apple Pay
To add money to Apple Pay, follow these four simple steps:
- Open the Wallet app on your device.
- Tap on your Apple Pay card.
- Select the “Add Money” option.
- Choose the amount you want to add and confirm the transaction.
It’s important to note that you can only add money to Apple Pay using a supported debit card or prepaid card that is compatible with the service.
Pro Tip: Before adding money to Apple Pay, make sure you have sufficient funds in the linked bank account or card to avoid any transaction issues.
Ready to open the virtual money vault? Don’t worry, the Wallet app won’t require a secret password or a dollar bill sacrifice.
Open the Wallet app
The Wallet app on your Apple device is a great way to manage your money. Open it up and learn how to make the most of this feature! Here’s how:
- Locate the Wallet icon on your device’s home screen.
- Tap it to open the app.
- You’ll see virtual representation of your cards, passes and payment methods.
- Swipe left or right to explore different sections.
- Look for settings to add money to Apple Pay.
To really benefit from the Wallet app, you need to customize it to your needs. Here are some tips:
- Keep digital cards up to date. Update or remove expired cards. This way, you can always use valid payment methods.
- Look for other services in your area. Transit cards, event tickets – you can add them and access them through the same interface.
- Set default payment methods. Prioritize cards you use often. This way, purchases through apps or websites will be faster.
Follow these tips and use the Wallet app to enjoy a secure way of managing your money. Get ready to streamline your digital transactions!
Tap on the added bank account
When you’re using the Apple Pay app, you may need to access your added bank account. Follow this three-step guide for a smooth experience:
- Open the Apple Pay app.
- Find and choose “Added Bank Accounts”.
- Tap on the bank account you want to use.
These steps allow you to use your bank account without trouble. Efficiency is key when it comes to managing finances through Apple Pay.
Plus, there are some unique points to consider when tapping an added bank account in Apple Pay. This process lets you enjoy secure and convenient payments while keeping financial information safe.
Here’s an example of why this feature is important. Someone forgot their wallet at home and needed to make a purchase. Thanks to their added bank account in Apple Pay, they were able to tap on it and finish their transaction easily. This saved them from embarrassment and provided convenience in unexpected situations.
Tapping on the added bank account in the Apple Pay app lets users make seamless transactions and keep their financial info secure. So explore this feature now – you never know when it’ll come in handy!
Select “Transfer to Bank”
Users can easily transfer funds from their bank accounts to Apple Pay! Follow these 3 steps:
- Open Apple Pay on your device.
- Tap the “Wallet” tab at the bottom.
- Select your bank and follow the prompts.
Remember, you must have enough in your bank account for the transfer. Also, fees or limits from your bank may apply – check details first.
Don’t miss out! Apple Pay’s “Transfer to Bank” gives you convenience and flexibility. Enjoy easy access to your funds – start today!
Enter the amount to transfer and confirm the transaction
Input the amount you wish to move and securely confirm the action. Follow this straightforward 6-step guide for a hassle-free ride:
- Open the Apple Pay app on your device.
- Tap the wallet icon at the bottom part of the screen.
- Pick your payment card.
- Find and click on the “Add Money” option.
- Input the quantity you want to transfer.
- Confirm the transaction after verifying all information.
Apple Pay employs encryption tech to protect your personal info during the process, delivering a smooth and stress-free experience.
Don’t miss out – begin now! Otherwise, you may miss out on this convenient way to top up your Apple Pay, potentially giving up rapid and secure transactions at your fingertips.
Conclusion
Adding money to Apple Pay is convenient and secure. Just a few steps and you’re done! It supports various sources, such as gift cards and prepaid cards. Plus, it supports multiple currencies, perfect for international users. Security-wise, Apple Pay takes it seriously with tokenization and biometric authentication. This keeps your financial info safe. It also provides a detailed record of your purchases in Apple Wallet.
Did you know? Apple Pay revolutionized mobile payments when they introduced it in 2014. It was one of the first platforms to popularize contactless payments on smartphones. It also set a new standard for digital transactions’ convenience.
Frequently Asked Questions
Q: How do I add money to Apple Pay?
A: To add money to Apple Pay, open the Wallet app on your iPhone and tap on your Apple Pay Cash card. Then, tap on “Add Money” and choose the amount you want to add. Finally, confirm your transaction with Face ID, Touch ID, or your passcode.
Q: Can I add funds to Apple Pay from my bank account?
A: Yes, you can add funds to Apple Pay from your bank account. Simply link your bank account to Apple Pay and transfer money from your bank account to your Apple Pay Cash card.
Q: Are there any fees for adding money to Apple Pay?
A: There are no fees for adding money to Apple Pay from a debit card or bank account. However, if you use a credit card to add money, you may be charged a cash advance fee by your credit card issuer.
Q: How long does it take for the added money to appear in Apple Pay?
A: Usually, when you add money to Apple Pay from a debit card, the funds are available immediately. However, if you add money using a bank account transfer, it may take 1-3 business days for the funds to appear in Apple Pay.
Q: What is the maximum amount of money I can add to Apple Pay?
A: The maximum amount of money you can add to Apple Pay depends on various factors, such as your bank’s limits and the type of card you are using. Typically, the maximum limit is $10,000.
Q: Can I add money to Apple Pay using a non-iPhone device?
A: No, you can only add money to Apple Pay using an iPhone or other compatible Apple devices like iPad and Apple Watch.

There is just something so calming about math and numbers. No matter what is changing in your life, math is always going to be a constant. You’re not going to wake up one morning to suddenly find that 1 + 1 suddenly = 5!
There’s been a lot of change in my life through growing up, and so I found solace in numbers.
- Why Social Impact Matters for Modern Businesses - December 5, 2025
- Beginner’s Guide to Online Casino Games: Tips to Get Started with Confidence - April 10, 2025
- Vintage Typewriters: The Art and Nostalgia of Manual Typing - October 18, 2023